Info Sheets Home - Polytunnels & Greenhouses - Community Allotments - Planting Guides - Organic Food Growing - Pests & Diseases
How should you plan out your plot? It all depends on the room you have and the aspect of your garden. The main thing to remember is that you will need 4 beds at least (why 4 will be explained later) and depending on the direction of the sun in your plot all small plants at the front and tall plants at the back.
A variation on this idea, suitable for very small gardens, is a high density method known as “square foot gardening” – visit the garden organic website
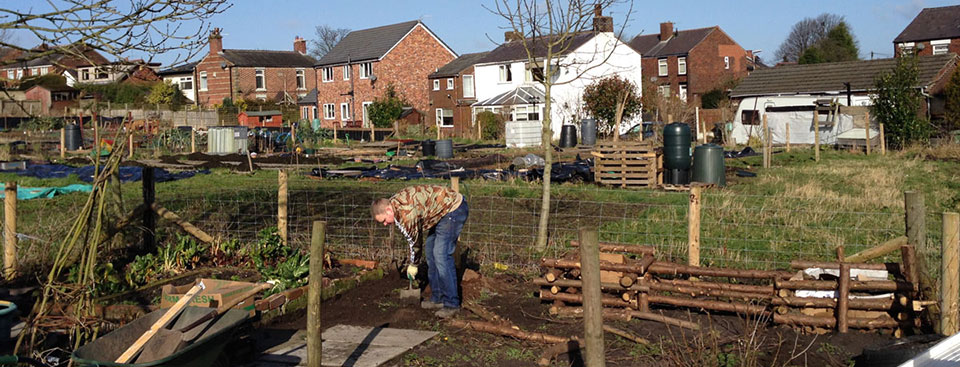
Particularly if your garden is on clay soils you may suffer from boggy ground. If so the best solution is to either create a small pond at the lowest point of your site so the water will have somewhere to drain into and/or create raised beds and back fill them with bought soil or compost. They only need to be a maximum of 2 feet deep and can be constructed out of recycled scaffolding planks or other bits of wood or old tyres. Raised beds will also improve your growing soil (if filled with good stuff) and make your plot easier to manage as everything is neatly in one area and if the beds are narrow enough to reach to the centre from either side then you can avoid walking on them which will avoid compacting your soil.
Which way does your plot face? North away from the sun or South towards the sun? This will determine how much sun or shade your plot is likely to get. You’ll also need to assess if you’re at risk from prevailing winds (the direction the wind most often blows). Obviously it’s not a lost cause if you don’t have a plot with maximum sunshine or if it’s exposed to wind and there are some things you can do to improve your chances of success. If you are attempting to grow some veggies in containers then the solution will be to move your pots to a more sheltered sunny position, which may mean putting them on the other side of the house. However if you don’t have the option of moving your garden then plant vegetable types that can tolerate some shade and construct a windbreak, e.g a willow screen or trellis.
Here are some veggies that can withstand some shade but they must get about 4 hrs of sunshine per day –
The best type of windbreak is the natural one. Whatever you use to stop the wind will need to be 50% permeable as anything solid, like a panelled fence, will only deflect the wind straight up which will cause turbulence on the other side. So a hedge is the best solution. Although it will take time to develop it is the cheapest option will not only provide protection from the wind but will also provide wildlife interest into the garden and maybe even be a source of more food for yourself. Choose native plants and you cant go wrong!
Although you can’t plan for every eventuality that may befall your plot there are some things that you will definitely need to get started-
There are lots of tools out there but the main ones you’ll need to get started are :- Spade Fork Hand Trowel Rake
If you’re container growing then a hand trowel and hand fork should do.
There is a temptation to buy cheap when it comes to tools and sometimes it’s just unavoidable. I’ve certainly bought many a cheap tool thinking it’ll be alright…. But usually they’re not. Once you get to a tough patch of soil SNAP! However if you have nice soil or containers and you don’t plan on doing any major digging then you’ll probably be fine with a cheaper brand. But if you’re on an allotment plot then most likely plenty of digging will be needed. Try to shop around especially on the internet and look out for some bargains. As long as you stick to the well known brands like Spear and Jackson, Bulldog or Clarke etc then you should be OK.
Also take a look at the Freecycle website. This website is for people you want to get rid of unwanted stuff but don’t want to send it to landfill. There is gardening stuff on there sometimes so keep your eyes peeled! Take a look at the classifieds as well and some second hand/antique shops e.g. Bygone times in Eccleston as they have some odd things like old tools, and these are sometimes in very good shape
If you’re involved in a community food growing project then perhaps you could introduce a ‘Tool Share’ initiative. The group can apply for a small grant and buy a set of tools which are kept in one place. People can then book them out when they need them and return when finished. BTCV run a grant scheme for groups in the first year that they become constituted: Go to http://www2.btcv.org.uk/display/community_network
Depending on where you buy your seeds price differs greatly. Some of the ‘cheaper’ grocery shops like Aldi sell lots of gardening things including seeds in the spring at very good prices. These seeds will possibly be of a lower quality compared to the more expensive, in that less of the seeds will be able to germinate. However I think they’re good value for money. Large DIY stores often have a lot of choice. Also have a look online, often prices are cheaper if you order a few months before the growing season.
Don’t forget that you can also save seeds from some of the vegetables you buy and grow them on rather than throwing them away. Good examples are melons, peppers, chillis, squashes, pumpkins: Wipe any flesh off the seeds and dry them on some kitchen paper on a window sill, then start them off indoors or in a greenhouse. You can even grow citrus fruit like oranges, lemons, limes and grapefruit from seeds, but you’ll need to keep them in the house whilst there is any risk of frost. They’ll do well on a sunny windowsill.
Often when you buy packets of seeds you’ll find there are loads of them in the packet, 1000s sometimes! When you only have room for a couple of plants in your plot it can be quite annoying to have lots of half used seed packets wasting away. So why not organise a seed swap?! That way everyone will be able to bring their left over seeds and swap them for something they haven’t got and then what’s left can be given to schools and day centres etc
The type and quality of your soil will be very important in determining the success of your food growing endeavours. It may be necessary to get a professional soil test carried out in a laboratory which will test for the presence of harmful chemicals in the soil. This will only be the case if you suspect contamination. This usually only occurs if your site is near an industrial area or has had a lot of land movement in recent years. Its better to be safe than sorry, you don’t want to poison people!
If you are in the process of establishing a site and need guidance regarding whether or not the soil requires testing, the local council’s environmental protection department has a register of contaminated land, therefore your first step could be to check this register. Contact ep@wigan.gov.uk
The Allotment Regeneration Initiative (ARI) provides a wealth of information on this issue, along with many other allotment related subjects. ARI Website
However that is the extreme of soil testing, and in most cases it will only consist of a nutrient and/or pH test, which can be done by simple home test kits.
There are many soil testing kits you can buy from a number of retailers. They range from the very simple to a bit more complex. And what you want to test for will determine what kit you buy. If you’re unsure or want to know exactly what nutrients your soil contains then a more complex kit will be needed with a variety of chemicals included. However if you’re just testing for the pH level of your soil then a very simple kit will suffice. I would suggest at this stage that a pH kit is all that’s needed.
The pH level of your soil will determine how successfully your plants grow. The pH scale is generally understood to indicate the acidic or alkaline levels of soil and runs from 0 – indicating high levels of acid to 14 – indicating high levels of Alkaline. 7 is considered the magic number which has a balance of the both. In most kits you will find a strip of indicator paper that will give you a colour to compare to a chart to indicate soil pH.
If your soil is in either extreme then you will need to add nutrients to help balance it out e.g. lime for very acidic soil and Aluminium sulphate to reduce very alkaline soils. Although often just adding organic matter that has the correct pH level is just as good e.g. try adding pine needles around plants that need more acidic soils like blueberries. Or once again go for raised beds. The pH level of your soil will also help indicate what pests and disease you’re more likely to face. For example, Potato scab is more common on alkaline soils however clubroot less so.
Soil/compost can be expensive., but if you’re growing in containers or raised beds then to start with you will need to buy some soil or compost unless you are organised and have already begun composting and making your own.
The difference between soil and compost - Both are made from decomposed organic material however soil is from a process of decomposition that has taken 100s of years and when mentioned on bags etc this means that it has been dug up from the ground and bagged (usually with a few fertilisers added) Compost is from more recently decomposed matter that has been specifically made to be used as a growing material and can be added to soil to introduce new nutrients. (See more on compost later). You can create your own compost but it will take a bit of time so you’ll have to buy some soil initially, and wait for your own compost to be ready. When it is you can add to soil and therefore you’ll need to buy a lot less soil in the future.
N.B. I’m going to personally suggest that you avoid soil with Peat in it. Check the bags and it will say Peat free. If it doesn’t then it has Peat in it. It’s a controversial subject. Peat takes thousands of years to form and is a unique habitat that supports its own eco-system, including numerous rare species. Peat bogs also store huge amounts of carbon which is released as carbon dioxide when peat is dug out and exposed to the air, thereby contributing to climate change. If you’re told that it’s from a renewable source be very suspicious: as mentioned it will take a long, long time for a peat area to reform, if that argument was true we could say coal is renewable!!! I have always used peat free and my plants , both veggies and bedding plants, have always done well. Peat rant over…..
Right, soil, the big DIY stores have good deals such as 3 bags for 2 etc and if you need a bit more than a few bags for your raised beds buy bulk as its a lot cheaper. Again look on the internet to get an idea for prices. Buying it loose rather than in ton bags works out a lot cheaper although sometimes you have to order a minimum amount for loose soil. But there’s always somewhere to put extra soil!
If you have an allotment or garden plot that has OK soil but would like to add nutrients (always a good idea once a year) then manure is your best bet. Manure whether its horse or cow is readily available from farms and stables. Just ask or you might see a sign outside saying help yourself (if you look around you’ll find it free). Just make sure it’s well rotted which means it shouldn’t resemble poo any more, just a nice crumbly mixture with bits of straw still in. (When getting from horse stables try to find one that uses straw rather than shavings for bedding as wood shavings take a long time to rot down). This can be added to your soil to make it lovely and nutrient rich. Just dig it well into the soil in winter. If you have an allotment site it is well worth setting up compost bays as well as a bay to store manure until it rots down. See the information and resource sharing section for local suppliers of manure. Network members can also borrow the network trailer to collect materials for their site.
There are a few ways to create a compost area. You can simply pile it up but a better solution and a neater one is to make or buy a compost bin. Councils occasionally run special offers where you can buy compost bins at reduced prices, just check on their website.
However it is very easy to make your own bin. There’s a few designs which can be seen here www.gardenorganic.org.uk/factsheets/gg24.php or www.gardenersworld.com/how-to/projects/basics/how-to-build-a-compost-bin/87.html. You can also use chicken wire with 4 supporting posts, it’s a good idea to put cardboard around the inner sides so you don’t get bits of waste falling through the mesh. However if you make your bin or if you buy it there are some points that should be followed-
There are some definite yes and no’s in what goes in your compost. Take a look at the table below for a basic list.
Greens - refer to what is quick to break down.
Intermediate - take a little more time.
Browns - take longer still.
Greens |
Indermediate | Browns | NOT to be composted |
| Comfrey Leaves | Fruit and veg scraps | Old straw | Meat and fish |
| Grass mowing | Bracken | Tough Veggie stems | Glass and tin |
| Poultry manure | Rhubarb leaves | Woody branches | Dog poo |
| Young weeds | Tea and coffee grounds | Autumn leaves | Used cat litter |
| Nettles | Tea bags | Evergreen clipping | Nappies |
| Vegetable plant leftovers | Cardboard | Fire ash | |
| Straw based animal waste | Newspaper | Plastics | |
| Cut flowers | Synthetic Fibres | ||
| Herbivore pet bedding | Perennial weeds |
Now you have your compost bin set up you need to start adding the ingredients. You need a good mixture of the items in the table and spread them out in the bin, add a little water if dry. It’s important to get the right balance of ingredients in order to provide a balance of nutrients, particularly carbon and nitrogen, and to make the composting process efficient. The ‘greens’ provide nitrogen and will act as ‘activators’ in that they will start the composting process off as they are quick and easy to break down. But you will need ‘intermediates’ and ‘browns’ to keep this process going and give the microbes etc something to keep feeding on and therefore to keep making compost. The browns provide the carbon, therefore if you’re adding mostly kitchen waste remember to add some torn up newspaper or cardboard every now and again to ensure there is sufficient carbon. Try not to add too much of the browns as this will slow up the process and create lumps of uncomposted material.
If your compost is not breaking down then it could be that you have too many ‘browns’ and if your compost is slimy and wet then you have too much ‘greens’ in the mix. Just add more of what’s lacking and it should correct itself. For more information about compost ingredients take a look at the following link: Dummies Website Compost Page
Compost is ready when the contents look like dark soil. It will still have bits of egg shell and tea bags in. It can be ready as soon as 12 weeks in summer although it may take longer, sometimes up to a year. Here’s some hot tips to speed up the process if you need your compost a little sooner.
Apply your compost in spring or summer as a mulch over areas that need a boost in nutrients i.e. areas that are used constantly for growing. Spread it about 1cm thick on top of the soil and lightly dig in.
So now you’ve determined the soil types in the various beds of your plots you can decide on where to put your veggies for this season's growing. As mentioned before four plots or more is the norm for veggie growing. To go with four growing areas vegetables are commonly arranged into four types. These four types will differ depending on what book or website you’re reading and it can get confusing. I find its best to find one that you’re happy with and stick to it no matter what else you read!
So the four types/families which I like to use are
Brassicas- e.g. Cabbage, Brussels sprouts etc
Roots – e.g. Carrots, beetroot, swede etc
Legumes – e.g. Peas, runner beans etc
Potatoes – e.g. …. Potatoes
The other family is onions e.g. onions, leeks, garlic etc. These can go in with any of the top 3 but I like to clump them mainly with Brassicas (I will squeeze onions in the other beds if there are any any gaps)
There are other veggies that can fit in with those mentioned above. These veggies are – Sweetcorn which I put with Legumes and Pumpkins/squashes which can go with potatoes.
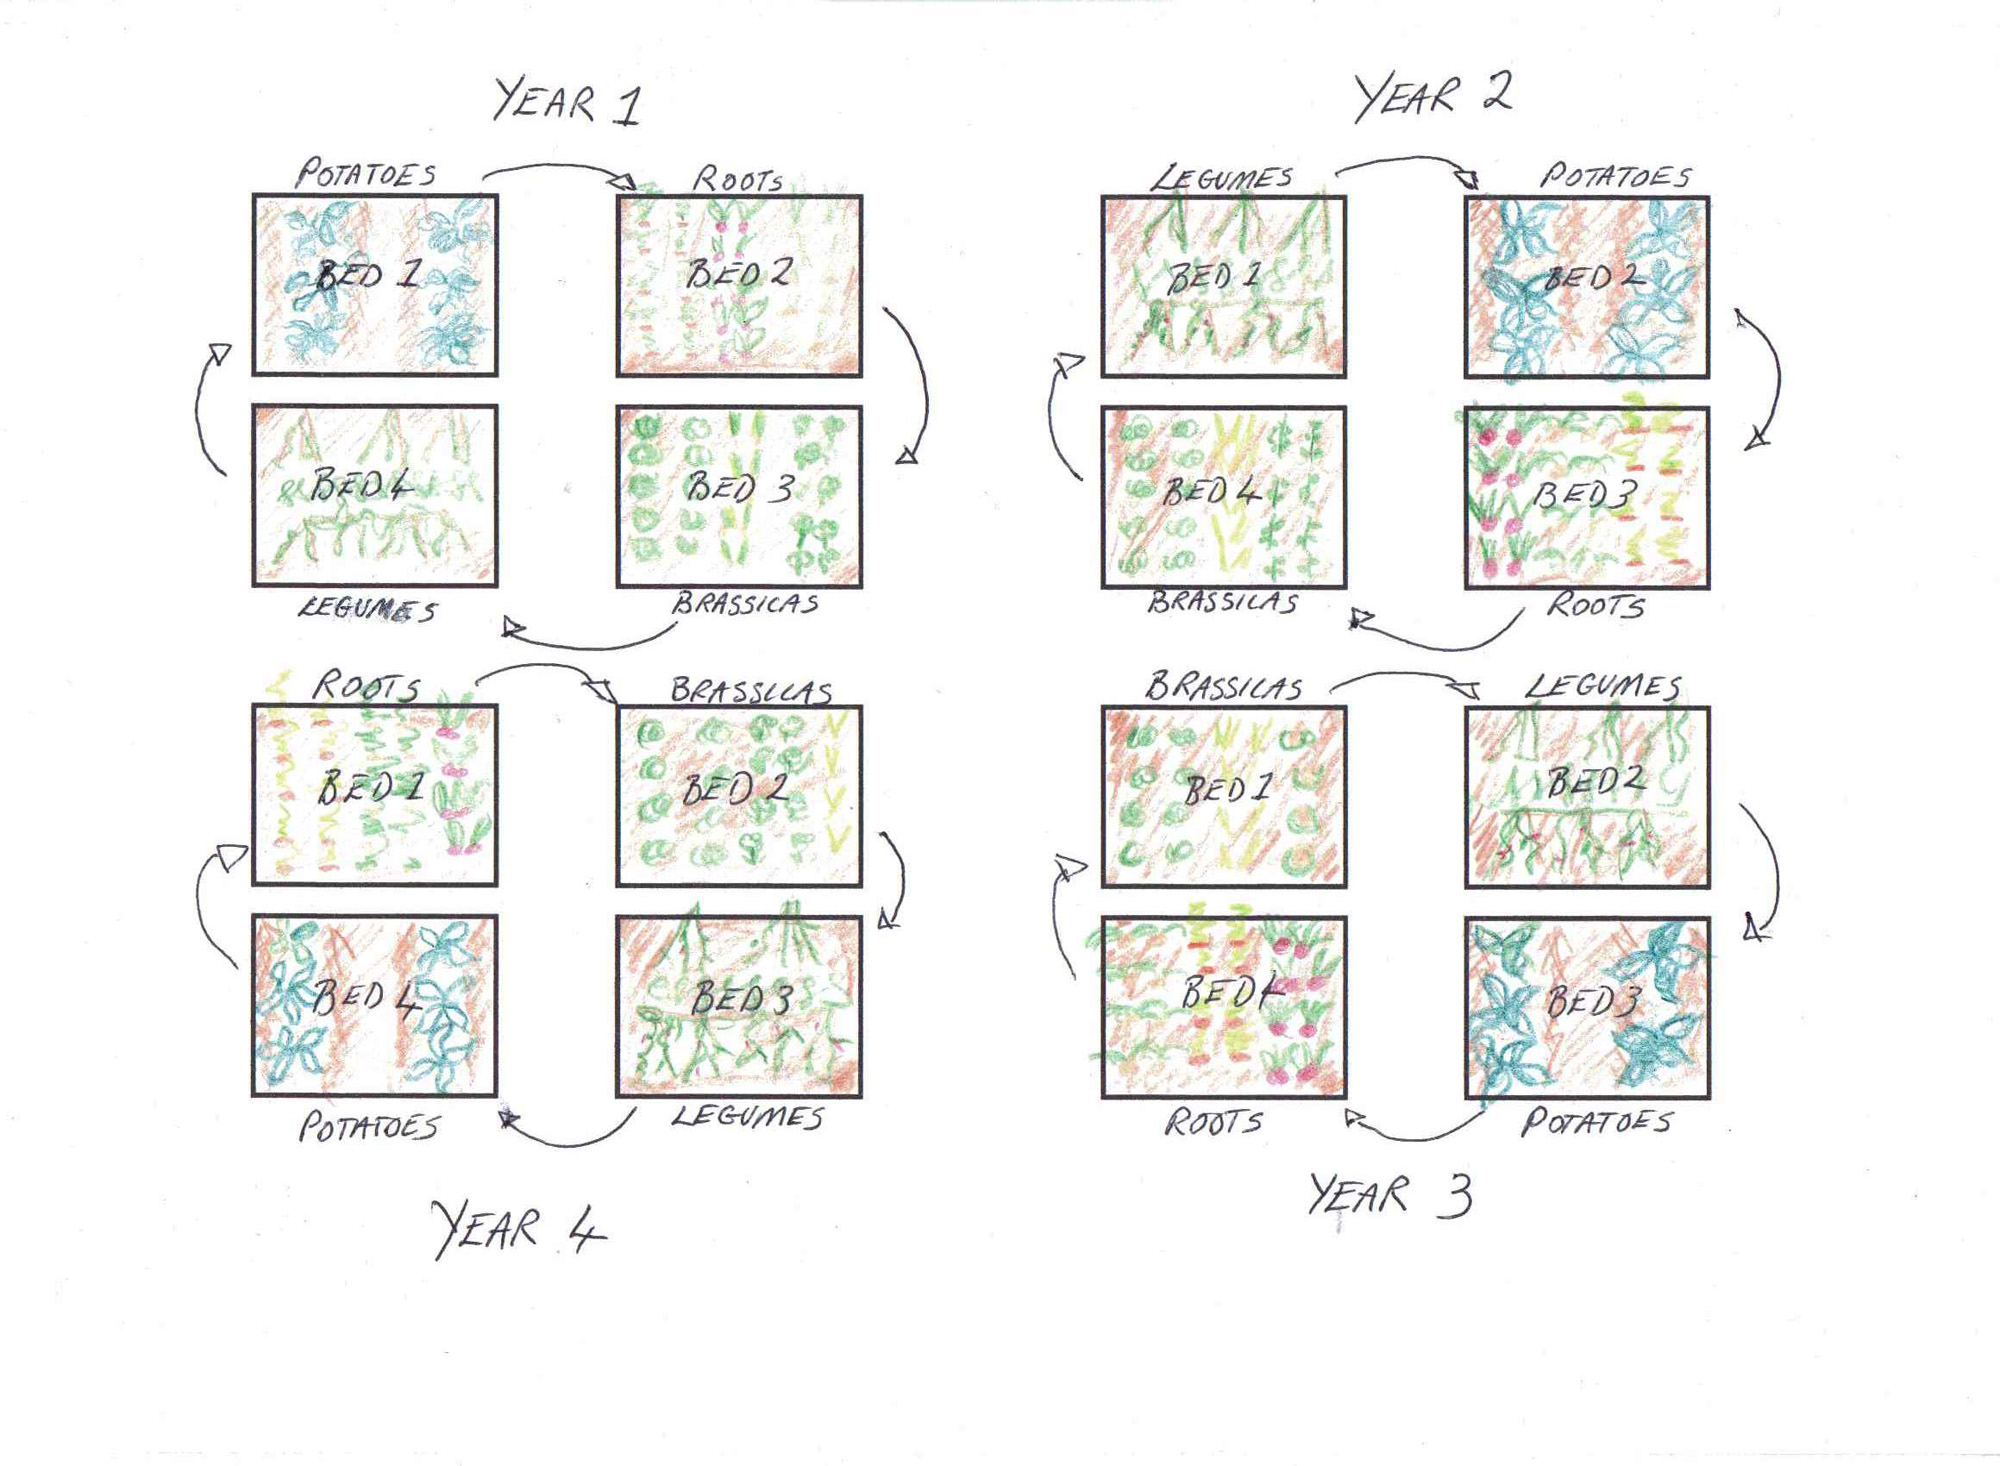
Its much better to keep to 4 groups as you can then track what’s in your plots in the rotation system (this will be explained) more easily. Also make a quick diagram of what you’ve put where, like diagram 1, and put it somewhere safe so you can refer to it when its time to move things around. As mentioned there are other ways to group your plants and definitions will differ e.g. some will put swede and turnip in with the Brassica family and some with the root family. Just find one way to organise that you’re happy with and stick to it.
You’ve heard me mention it a few times and now I’m going to explain it..
As you can probably guess the rotation system is all about rotating your crops. This is usually done in a 4 year rotation and is why you need 4 plots and to divide your veggies into the 4 families.
There are two main reasons. The first is that all crops suffer from pests and diseases and certain pests and diseases will attack certain crops. E.g. Blight will attack potatoes and others in that family but nothing else, Clubroot will attack Brassicas but nothing else etc. Therefore if you left your crops in the same place every year the amount and likelihood of disease will build up. So we rotate veggies in the ‘family’ groups mentioned before because the next crop to occupy the bed will be immune to most diseases that may have developed with the previous crop. And in the 3 years its takes before that original crop occupies that same bed hopefully any disease that affected it before has died away.
The second reason is as mentioned above some crops will benefit from following on from others. So, for example, Brassicas love Nitrogen and this is something that all your peas and beans will put into the soil naturally. So always make sure that your Brassicas go into the bed that your Legumes were in last year and so on…..
So in conclusion your rotation plan should look a little something like this:-
When taking on an allotment plot that has had a previous owner/s then unless you knew them or they’ve kindly left you their planting plan it will be a game of chance whether you got the plants in the right place. All you can do is dig over the plot well, therefore exposing as much soil and bacteria etc to the elements and fertilize well through out the year to help the plants overcome any problems.
Right, now you’ve decided your vegetable groups and have tested your soil you can decide what goes in what bed. This is important because each family has different requirements in relation to how you prepare the soil, which is why crops are divided into groups and then rotated each year.
Here is a short list of what the different plant families like and the order in which they should follow one another:
Potatoes: you’ll need to dig in lots of manure as that’s what potatoes like…. However Legumes don’t like lots of freshly dug in manure but will benefit from the manure the year after the potatoes have been there.
Brassicas like Nitrogen which Legumes are very good at putting into the soil. So your Brassicas should go in the bed the year after Legumes. If your soil test have revealed that the soil where you what to put the Brassicas is slightly acidic then you will also need to add a bit of lime.
The Root crop can then follow the Brassicas. In soils where there is a lot of clay or stones consider growing carrots and parsnips (that have long roots that go down into the soil) in containers or dig the soil well remove as much of the large clay clumps and stones and mix manure and compost into the remaining soil. Also you can sow specific carrots and parsnips that have short roots. After a few years of moving crops, digging over the soil and the effect of certain veggies should hopefully improve the soil enough for carrots and parsnips.
If you have the room in your plot or back yard then its also a good idea to put aside one area or large pots/containers for PERENNIAL plants. Perennial means that they will come back every year without the need for re-seeding. (All other veggie types are ANNUAL meaning they will need to be reseeded every year). Because your perennial plants will come back each year they are removed from the rotation system of four beds and will need their own area. These plants can include – Artichokes, asparagus and rhubarb. Just keep an eye on these plants for disease and if they do become a source of problems remove and replace with something else.
If you want to start small for whatever reason, it may be space or cost etc then you can still grow or even herbs in containers. Your containers don’t need to be the traditional plant pot. You could use old tyres stacked on top of each other (very good for potatoes and carrots), old boots, buckets and footballs cut in half. Just make sure whatever you’re using is sturdy, won’t let water run everywhere but does have some kind of drainage. So a bucket that has been discarded as it has a crack will be perfect. Window boxes are perfect to grow herbs in. And as long as you stick to veggie varieties that stay small you could even give growing them inside a go! Just fill your container with soil and place in a spot that will get some sun, don’t forget to water and you should have success!
Not so much a problem if you’re on an allotment but if your plot is at home then I know dogs and cats can be a problem! Again raised beds make this issue easier to manage or just a few small growing areas rather than one large one, as you can then construct a small ‘cage’ over your beds. I’ve made one out of bamboo canes and round rubber connectors that you can buy online but you can also use old stiff hose pipe and create a curved structure and buy some netting to drape over and pin into the ground. This will also help to protect against pests such as cabbage butterfly, pigeons, and carrot fly.
Right so now you have got your planting plan done, you’ve tested the soil and know what to add if anything, and you know what’s going where. So now what plants do you get and how do you plant them?
Most of your veggies will be grown from seed with a few exceptions. And most of these seeds can be planted outside straight into the soil. If you did have room to spare at home or access to a greenhouse or polytunnel then you can start most things off indoors (although best not carrots and parsnips) it just means that the veggies will be ready sooner. Obviously some plants need more warmth than others in order to germinate e.g. Chillies, peppers, tomatoes and it that case you will need indoor space
I’m going to suggest that if you’re new to this food growing thing just stick to those that can be planted straight outdoors to start with.
Weeding - Not the favourite job on the plot and if you’re growing in containers you can be quite smug here as not much if any will be needed. However it is very important you get the weeds under control. For the first few years on a new or abandoned plot the weeding will be quite heavy but after that if you’ve kept on top of them it will get easier. Remember to keep the weeds for your compost, but avoid putting seed heads like dandelion clocks on the compost heap because the heat generated probably won’t be sufficient to break them down. If you don’t weed its likely that your plants will be over crowded and the weeds will compete for water. So dig ‘em up!
It is important that the soil in your beds is as fine as you can get it. Remove stones, clumps and rogue roots and rake it smooth, this will help keep your lines straight and let your plants grow without hindrance.
Now the best thing to do when deciding how to plant your seeds is to look at the back of the seed packet. It will have the depth at which to plant the seeds and the spacing between plants and rows.
For most of the plants you will need to make small furrows (called a drill) in to the soil in straight lines and at a depth described on the seed packet. You can either do this with a hoe or spade but I find the using your hands much easier. Just use the side of your hand and push the soil aside. Now tip a small amount of seeds in one hand and then take a pinch of them and sprinkle along your furrow. Most of the seeds will be tiny e.g. carrot seed and its easy to lose them in the soil. For these just sprinkle along and then once the plants have grown to about 2” thin them out so you have the desired spacing (thinning out consists of pulling up the unwanted plants to ensure you have enough space for each veggie to mature properly) . For other plants some seeds will be a bit larger like beetroot. For these it is possible to get the spacing on sowing, however some thinning may still be needed. Larger seeds and some other types will need individual holes to be planted into - please see 'Planting guides' for more information on these
Companion planting is a method used to distract or repel insects from your crops. There is no scientific evidence that proves this works however you will hear many people swear by it, I have certainly seen some positive results. And its important to remember that where there is a monoculture (only one type of plant) pests and disease thrive. So its always a good idea to plant a mix of plants and that includes bedding plants in amongst your veggies. Some plants can be used to deter pests and others are sacrificial, in that, insects will infest that plant rather than your veggies
Some veggies can be planted with others in order to aid one or both.
Download the table for some ideas.
I’ve mentioned a few times about encouraging wildlife into your allotment plot or garden even if you have a tiny garden. Just leave a small corner or area which is out of the way that can just be left. Yes it will look ‘messy’ but you will be giving all sorts of helpful creatures somewhere to hide and live. These will in turn eat the slugs and snails, the aphids and other insects. A pond, even if it's tiny (2ftx2ftx1ft deep) will attract in all sorts of other animals like frogs and toads and will provide a drinking area for birds and another mammals that will in turn eat those pests!
A garden or allotment plot can be a great place for people to enjoy but with a little compromise can be fantastic for wildlife too!
I'm not going to bore you too much with the science of why growing a fruit tree from a seed won't get you the fruit tree you're hoping for - mainly because I'm not sure I understand it completely!
Suffice to say fruit trees reproduce in a similar way to humans - in that they need 2 different chromosomes in order to be fertilised. As we all know flowers are fertilised by the transference of pollen to one flower to another of the same species. All apple and pear trees need to be *cross- pollinated with pollen that comes from a tree of a different variety to themselves. So, for example, if you had two Bramley apple trees in your garden and no others for miles around then you will never get any fruit because you need a different variety of apple to fertilise your Bramley blossom and vice-versa.
Now with all this cross-pollination going on all sorts of genes from different trees, via the pollen carried by our friends the bees (other insects are involved e.g. wasps, flies, etc), end up fertilising each different blossom. So although the fertilisation process produces the apple you're expecting on your Bramley tree i.e. a bramley apple, all the seeds within that apple will be carrying genes from various other apple trees. So when you plant that seed you won't get a Bramley apple tree! You'll most likely get a horrible tasting and looking apple thing.
Now on occasions lovely ,delicious new varieties of apples are discovered by planting a seed and the seed you plant may just become a new variety! That is after all how most of the apples in the world have been discovered!
SO... grafting is basically the cloning of the mother plant which ensures you get the fruit you're after.
Grafting is the union of ROOTSTOCK & SCION WOOD
Grafting takes place in Dec – March